When it comes to replacing motors in garage door openers, we understand that this task can seem daunting. But fear not, with the right knowledge and tools, it’s a manageable DIY project.
In this article, we’ll guide you through the process of replacing a garage door motor opener, and provide useful tips to make the installation process as smooth as possible.
Garage door motors are essential components of any garage door openers system. They power the movement of the door, whether it’s a chain-drive, belt-drive, or screw-drive system.
Over time, motors can wear out or fail completely, requiring a replacement to keep your garage door opener functioning properly.
Understanding the compatibility between your current used garage door opener motor and the replacement motor is crucial, so it’s important to research the specific type and model you need before getting started.
Before we dive into the steps of replacing a garage door motor, it’s important to emphasize safety precautions. Working with electrical components and moving parts can be dangerous.
Always make sure to disconnect the power source and follow the manufacturer’s guidelines to avoid accidents or damage.
Recognizing the Need for Garage Door Motor Replacement
Decreased Functionality
Over time, it’s natural for a garage door opener and motor to experience wear and tear. When we begin to notice our garage door opener taking longer than usual to open or close overhead door, or it struggles to lift the door, it might be an indication that the motor needs to be replaced.
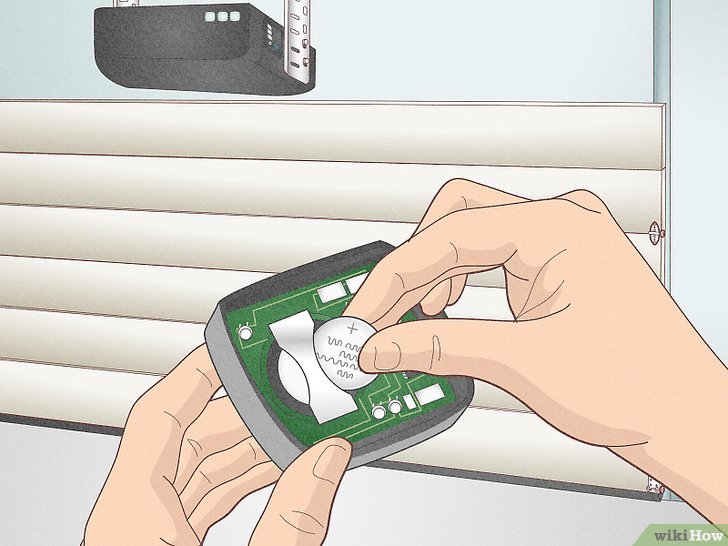
Another sign of decreased functionality is when our garage door openers doesn’t respond consistently, even with new batteries in the remote or a clear path for the sensors.
Unusual Noises
As the garage door motor operates, it’s normal for it to produce some noise. However, when we start hearing grinding, squeaking, or other unusual or loud noises, it could be a sign that the motor is nearing the end of its life.
This is especially true for chain-drive motors, as they use a metal chain that can become louder over time. Belt-drive motors, on the other hand, utilize a rubber belt and tend to be quieter, so any distinct noises coming from them should be addressed promptly.
Malfunctioning Sensors
Safety laser sensors play a crucial role in preventing accidents by detecting obstacles and stopping the door from closing.
When we notice our front garage door opener motor reversing direction unexpectedly or refusing to close altogether, it might be due to malfunctioning sensors.
First, we should clean the sensors and ensure that nothing is blocking their path. If this doesn’t resolve the issue, it may be time to replace the front garage door motor’s motor unit.
Choosing the Right Motor For Garage Door Motor Replacement
Types of Motors
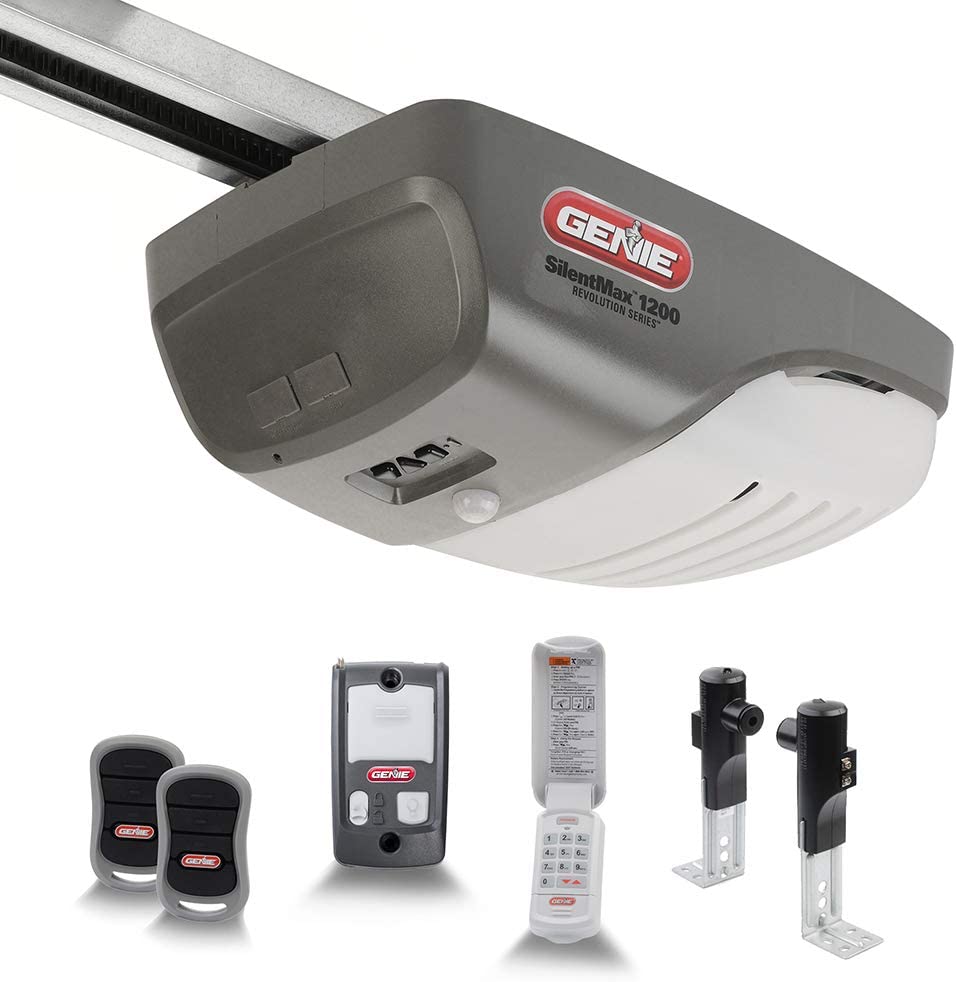
When it comes to selecting the right motor for your garage door openers, there are several types of motors available. Understanding the differences between them can help you make an informed decision. Here are the primary motor types:
- Belt-drive motors: These motors utilize a rubber belt to operate the garage door, offering quiet operation and reliable performance. They are a popular choice for residential garage doors.
- Chain-drive motors: These motors use a metal chain to move the garage door. Although they can be louder than belt-drive motors, chain-drive motors are generally more durable and provide a long-lasting solution.
- Screw-drive motors: These motors operate using a threaded metal rod that turns to move the garage door. They offer a balance between noise and durability, making them a suitable option for many homeowners.
- Direct-drive motors: With fewer moving parts, direct-drive motors are typically quieter and more efficient than other motor types. They can be more expensive but are well-suited for heavy or industrial garage doors.
Features and Compatibility
When choosing a motor for your new garage door opener now, it is crucial to consider its features and compatibility with your existing garage door system. Some key features to look for include:
- Power: The motor’s power determines its ability to lift the garage door effectively. For standard-sized garage doors, a motor with a 1/2 horsepower (HP) rating should suffice. For larger, heavier doors, you may need a motor with 3/4 HP or even 1 HP capacity.
- Speed: A faster motor can open your garage door more quickly, which can be a desirable feature, especially if you frequently use your garage. Look for motors with opening speeds of 7-8 inches per second.
- Safety features: Ensure that the motor you choose has built-in safety features, such as an automatic reverse function that stops and reverses the door if it encounters an obstacle during closing.
- Remote access: Some garage door motors are compatible with smartphone apps, allowing you to monitor and control your garage door from anywhere. This can be particularly useful if you want to ensure the security of your garage when you’re away from home.
Lastly, make sure that your chosen motor is compatible with your garage door’s brand and model as well as your house and desired features.
It may be helpful to consult with a professional installer or a knowledgeable sales representative to ensure you select a motor that meets your house and specific needs and preferences.
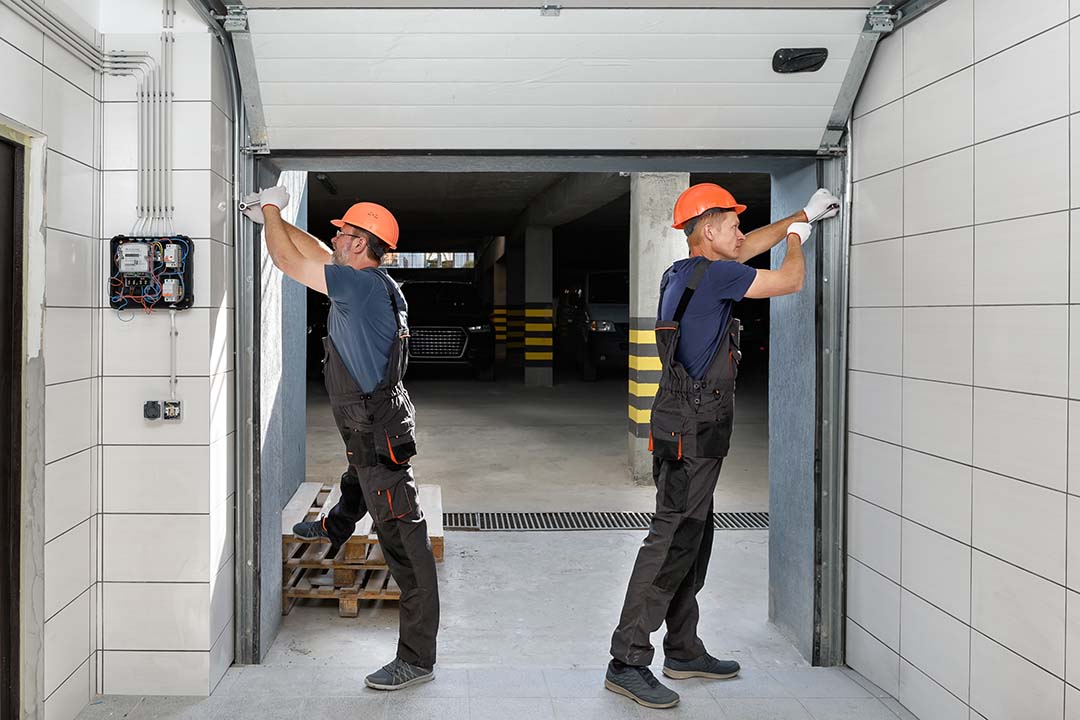
When To Know You Need Professional Help
In some cases, doing a garage door motor replacement might be a straightforward process. However, there are situations when it’s best to call in a professional garage door repair company to ensure the job is done correctly and safely.
Here are a few instances when you might consider reaching out to an expert:
- Difficulty in identifying the issue: If you’ve checked all the possible causes for your garage door malfunction, such as the remote control, sensors, and springs but still can’t identify the problem, it’s time to call a professional. They have the expertise to diagnose and fix the issue promptly.
- Inexperience with DIY repairs: While there are tutorials available for replacing garage door motors, if you’re not confident in your abilities or lack experience in handling such repairs, it’s better to get a few hundred dollars and leave it to a specialist. Incorrect installation can worsen the problem or pose safety risks.
- Heavy or large garage door: Some garage doors, especially those made of heavy or high-quality materials, may be difficult to handle on your own. In these cases, it’s recommended to seek professional help to avoid potential injuries or damage to the door.
- Complex garage door systems: If your garage door system has additional features, such as a built-in security system or smartphone integration, it may not be as simple to replace the motor on your own. Professionals are familiar with these systems and can ensure proper installation without compromising the additional features.
The cost of hiring a professional to replace your garage door motor will usually be a few hundred dollars, but the cost will vary depending on the cost of several factors, such as the brand and model of the garage door motor unit and the type of garage door.
Here’s a quick overview of average costs by motor type:
| Motor Type | Average Cost |
|---|---|
| Chain-drive | $275 to $600 |
| Belt-drive | $275 to $725 |
| Screw-drive | $350 to $650 |
It’s essential to weigh your skills, tools, and the complexity of the repair before attempting to replace your broken garage door motor. If you’re unsure or encounter difficulties during the repair process, don’t hesitate to reach out to a professional for assistance.
Preparation for Replacement
Gathering Tools and Materials
Before we begin the process of replacing our garage door motor, it’s essential to gather all the required tools and materials. Having everything ready will save us time and ensure a smooth process. We will need:
- A new garage door motor suited for our specific door type (chain-drive, belt-drive, screw-drive, or direct-drive)
- Step ladder
- Adjustable wrench
- Screwdriver set
- Pliers
Additionally, we’ll need to fully understand any specific instructions provided by the manufacturer of the new motor, as they may differ slightly.
Safety Measures
Safety is crucial when working with garage door motors, as they can be heavy and involve high tension springs. Before starting the replacement process, here are some important safety precautions to follow:
- Ensure the garage door is closed and locked.
- Disconnect the electric power to the opener by unplugging it from the outlet.
- If our garage door motor is connected to any cables, disconnect them as well.
Once we’ve gathered our tools, materials, and taken the necessary safety precautions, we’ll be ready to proceed with the installation instructions for replacing our broken garage door motor.
Removing Old Garage Door Motor
Disconnecting Power and Opener
Before we start, it’s essential to ensure our safety. We must turn off the garage door opener’s power and unplug it from the wall socket. Additionally, disconnect any connections between the trolley and the overhead door and motor unit by unplugging the associated cables.
Loosening and Detaching Components
Next, we’ll loosen the chain driving the garage door opener. To do this, use a wrench to turn the tension nut mounted on top of the trolley. With the chain loosened, carefully remove the garage door opener from the attached track on the rail system.
At this stage, we need to detach the device’s motor unit from its housing unit. Locate any screws, bolts, or fasteners securing the unit and unscrew them.
Once we have access to the motor, we’ll want to disconnect the battery backup safety laser sensor wires. Gently remove the bolts from the connectors by pressing down the release tabs using a small, flathead screwdriver.
With the motor unit free, we can now remove it from the garage door opener assembly. Be sure to keep all removed components organized and labelled to make the complete reassembly process more manageable.
Now that we have the old garage door opening motor removed, we can proceed with the installation of the replacement parts and a new motor to restore the functionality of our garage door opening system.
Installing the New Motor
Assembling the Motor and Rail
Before diving into details, let’s make sure we have the necessary tools. You’ll need screwdrivers, a socket wrench, and wire strippers. Now, let’s begin with assembling the motor and rail.
We’ll follow the manufacturer’s instructions to ensure proper assembly and alignment. We’ll first need to assemble the rail, which is typically done in sections.
- Slide each rail section into one another, ensuring they fit snugly.
- After assembling the rail, attach the sprocket and chain assembly to the rail.
- Now, insert the carriage that connects the motor on one end of the rail and the door bracket on the other.
Attaching Components and Ensuring Alignment
Now that our motor and rail assembly is together, we’ll attach it to the garage wall and door opener. We’ll need to make sure everything is aligned and functioning properly.
The Steps To Align Garage Door Openers:
- Attach the garage door opener to the rail assembly.
- Mount the motor assembly to the garage ceiling using brackets and support struts.
- Align the rail with the garage door, making sure the door bracket properly connects to the carriage.
- Double-check all connections and bolts, ensuring everything is secure and aligned.
Connecting Power and Sensors
With the motor and rail components in place, it’s time to connect the battery backup power and sensors. Make sure to turn off the power to the attached garage before proceeding.
- Plug the motor unit into your garage’s electrical outlet, or hardwire it if necessary.
- Reinstall the safety laser sensors by connecting the wires to their respective terminals on the motor unit.
- Test the safety sensors following the manufacturer’s instructions.
- Finally, reconnect the garage door opener keypad and remote as needed.
Congratulations! We’ve successfully installed the new motor for our garage door opener. Don’t forget to test its functionality, ensuring smooth and quiet operation. If any issues arise, consult the manufacturer’s manual and make adjustments as needed.
Final Adjustments and Testing For the Garage Door Opener And Motor
In this section, we will discuss the final adjustments and testing after replacing a broken garage door motor. We will cover setting limits and force controls, alignment of safety sensors, and testing for smooth operation to ensure your garage door functions properly.
Setting Limits and Force Controls
After installing the the new garage door motor and opener , it’s crucial to set the limits and force controls. This helps ensure the new garage door opener opens and closes at the right positions and with the appropriate amount of force. Follow these steps:
- Locate the limit adjustment screws on the motor unit. They may be labeled as “up” and “down” or “open” and “close.”
- Adjust the limit screws incrementally, using a small screwdriver, to set the door’s open and close positions.
- For force controls, locate the “up” and “down” force adjustment dials, typically on the back of the motor unit.
- Test the door operation to determine if the door opens fully and closes firmly without exerting too much force or causing excessive noise.
- Adjust the force controls as necessary to achieve smooth, even operation.
Alignment of Safety Sensors
Proper alignment of safety sensors is essential for the safe operation of your garage door opener. These sensors detect objects in the path of the garage door opener, and prevent it from closing if something is detected. Follow these steps to align the sensors:
- Locate the two safety sensors located at the bottom corners of the garage door track.
- Ensure the sensors are properly mounted and securely fastened to the mounting brackets.
- Verify that the sensors are level and aligned with each other. They should be pointing directly toward each other.
- Look for the indicator lights on each sensor. Both lights should be solid when properly aligned. If they are blinking or off, adjust the sensors until the lights are solid.
Testing for Smooth Operation
After making all the necessary adjustments, test the garage door opener to ensure it’s operating efficiently and safely. Follow these steps:
- Manually disconnect the garage door from the opener by pulling the emergency release cord.
- Test the door’s balance by opening and closing it manually. The door should move smoothly without any friction or resistance.
- Reconnect the door to the opener and test the mechanism using the remote or wall control.
- Check for any unusual noises, jerkiness, or excessive force during operation. If any issues are found, reevaluate the limit and force settings and make further adjustments as needed.
- Verify that the safety sensors work by placing an object in the door’s path while attempting to close it. The door should reverse automatically.
Remember to keep up with regular garage door maintenance, including lubricating moving parts and inspecting the hardware, to prolong the life of your garage door motor and ensure smooth operation.
Regular Maintenance and Service
Lubrication and Inspection
One important aspect of garage door maintenance is lubrication. To keep your garage door in top condition, we recommend lubricating the tracks, rollers, and other moving parts at least twice a year.
You can use a silicone-based lubricant or a lithium-based grease. Make sure to clean any debris from the tracks and rollers before applying lubricant.
In addition to lubrication, regular inspection of your garage door is crucial to ensure its smooth operation. We suggest inspecting the rollers, springs, cables, and other hardware for signs of wear or damage.
Replace any worn or cracked rollers, and ensure that all components are properly tightened and aligned.
Professional Garage Door Service
While some maintenance tasks can be done by homeowners, it’s essential to consult with a professional garage door service provider for more complex issues and repairs.
A knowledgeable technician will be able to identify and fix problems, keeping your garage door safe and functioning properly. Professionals also have access to specialized tools and expertise that are necessary for tasks such as spring replacement and door balancing.
If you suspect your garage door is unbalanced, don’t attempt to fix or repair it yourself. Instead, call a service technician for assistance. An unbalanced garage door spring also can be dangerous or cause further issues.
Garage Door Repair Clearwater FL
For residents of Clearwater, FL, and the surrounding areas, finding a reliable garage door service provider is essential for maintaining your garage door’s performance.
Local companies such as Majestic Garage Door can offer a wide range of services, from routine maintenance to more complex repairs and replacements.
It’s always a good idea to research potential providers and choose one with a strong reputation, experienced technicians, and fair pricing. Regular maintenance and timely repairs will help extend the lifespan of your garage door and keep it running smoothly.
Garage Door Motor Replacement – FAQ
How much does it cost to put new motor on garage door?
the cost to replace a garage door motor can range from $220 to $825, depending on the model, brand, and horsepower rating. Additionally, you can expect to pay between $130 and $510 for labor, which typically takes between 2 and 6 hours.
Can I replace just my garage door motor?
Yes, you can replace just the motor on your garage door opener. However, it’s important to note that if your opener is old or has other issues, it may be more cost-effective to replace the entire unit rather than just the motor.
It’s also important to ensure that the new motor is compatible with your existing opener and that the installation is done correctly to avoid any safety hazards.
Can you install new garage door motor by yourself?
While it is possible to install a new garage door motor by yourself, it is generally recommended to hire a professional for safety reasons.
Garage door openers can be heavy and difficult to handle, and improper installation can lead to serious injury or damage to your property.
If you do decide to install a new garage door motor yourself, be sure to carefully follow the manufacturer’s instructions and take all necessary safety precautions.
Can you replace garage door motor without changing the rails?
According to my sources, it may be possible to replace a garage door motor without changing the rails, but it can be difficult to do and it is rare that they will fit and function properly.
It’s important to note that automatic garage doors have their own set of tracks, and if you don’t install them, many issues can arise that make your automatic garage door opener less reliable.
It is generally recommended to replace the entire opener, including mounting hardware, rails, wired door controls, and wireless remote devices.