How To Replace Garage Door Seal?
Garage doors are an important component to any home. They offer convenience, security, and aesthetics.
However, overtime, the garage door seal can become damaged, causing unwanted elements such as rain, snow, and pests, to enter the garage.
This can be frustrating and potentially lead to costly repairs.
Understanding the importance of garage door seals and how to replace them when needed, can help maintain the integrity of your garage and prolong the lifespan of your door.
Understanding the Importance of Garage Door Seals
Garage door seals are an essential component of any garage. They play a pivotal role in preventing unwanted elements from entering the garage, including dust, dirt, and debris.
When functioning properly, they create an airtight barrier between the garage door and the exterior of the home.
This barrier helps regulate the temperature inside the garage, keeping it cool in the summer and warm in the winter.
Additionally, a tight seal prevents pests such as rodents and insects from entering the garage, reducing the risk of damage to property and potential health hazards.
Garage door seals come in different shapes and sizes, and choosing the right one for your garage door is crucial.
The right garage door seal will not only improve the functionality of your garage door but also enhance its overall appearance.
Types of Garage Door Seals
There are several types of garage door seals to choose from, each with its own unique benefits.
The most common types of garage door seals include:
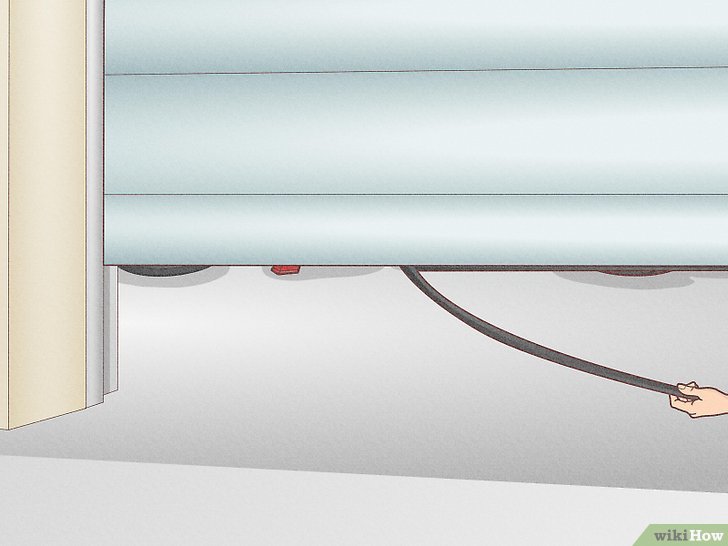
- Bottom Seal: This type of seal is located at the bottom of the garage door and creates a tight barrier between the door and the ground. It is especially useful in preventing water and other elements from entering the garage.
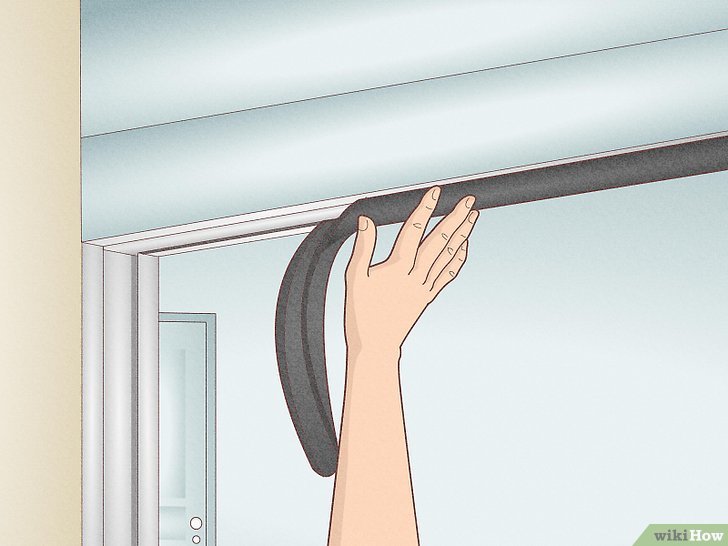
- Side and Top Seal: These seals are located on the sides and top of the garage door, creating a seal between the door and the frame of the garage. They are especially useful in preventing air and moisture from entering the garage.
- Threshold Seal: A threshold seal is installed at the bottom of the garage door, creating a seal between the garage floor and the door, preventing air and moisture from entering the garage. This type of seal is especially useful in preventing water from entering the garage during heavy rainfall or snow.
Benefits of Properly Sealed Garage Doors
A properly sealed garage door can lead to several benefits, including:
- Reduced energy costs by regulating the temperature inside the garage. A well-sealed garage door can help keep your garage cool in the summer and warm in the winter, reducing the need for air conditioning or heating.
- Prevention of pest and rodent entry. A tight seal can prevent rodents and other pests from entering your garage, reducing the risk of damage to property and potential health hazards.
- Protection of belongings from water and other elements. A well-sealed garage door can prevent water and other elements from entering your garage, protecting your belongings from damage.
- Prevention of garage floor damage from moisture and debris. Water and debris can cause damage to your garage floor, leading to you needing professional garage door repairs. A well-sealed garage door can prevent this damage from occurring.
Signs Your Garage Door Seal Needs Replacement
Knowing when to replace your garage door seal is important in maintaining the integrity of your garage.
Some signs that indicate it may be time to replace your garage door seal include:
- Torn or cracked seal. If you notice that your garage door seal is torn or cracked, it may be time to replace it.
- Visible gaps between the garage door and the seal. If you can see gaps between your garage door and the seal, it may be time to replace the seal.
- Pest and rodent entry into the garage. If you notice pests or rodents entering your garage, it may be a sign that your garage door seal needs replacement.
- Increased energy costs. If you notice that your energy bills have increased, it may be because your garage door seal is not functioning properly.
- Water or debris entering the garage during rainfall or snow. If you notice water or debris entering your garage during heavy rainfall or snow, it may be a sign that your garage door seal needs replacement.
Overall, a well-sealed garage door is essential in maintaining the functionality and appearance of your garage. If you notice any signs that indicate your garage door seal needs replacement, it is important to take action as soon as possible to prevent further damage and maintain the integrity of your garage.
Tools and Materials Needed for Garage Door Seal Replacement
Replacing the garage door seal is an easy and cost-effective way to improve the insulation of your garage.
Before you start the process, make sure you have all the necessary tools and materials.
This will help you complete the job quickly and efficiently. Here are the tools and materials you’ll need:
- Tape measure
- New garage door seal
- Scissors or utility knife
- Soap and water or household cleaner
- Towel or rag for cleaning the door and track
- Screwdriver
- Tapping block or rubber mallet
Measuring and Purchasing the Right Seal
Before you purchase a new garage door seal, it’s important to take accurate measurements of the door to ensure the seal fits properly.
Measure the width and length of the garage door, along with the width of the channel that holds the seal.
This information can be used to purchase the correct size and style of garage door seal.
When selecting a seal, consider the climate in your area and the type of seal that will best suit your needs.
For example, a threshold seal may be ideal if you live in an area with heavy rain or snowfall.
This type of seal will prevent water and debris from entering your garage and damaging your belongings.
Another factor to consider when purchasing a garage door seal is the material it’s made of.
Rubber and vinyl are the most common materials used for garage door seals, but there are other options available.
Rubber seals are durable and can withstand extreme temperatures, while vinyl seals are more affordable and easy to install.
Essential Tools for the Job
Aside from basic tools such as a screwdriver and utility knife, a tapping block or rubber mallet is essential for installing the seal.
The block or mallet is used to gently tap the seal into place and secure it in the channel.
This will ensure that the seal is properly installed and will provide maximum insulation for your garage.
Before you start installing the new seal, make sure to clean the door and track thoroughly.
Use soap and water or a household cleaner to remove any dirt or debris from the surface.
Dry the door and track with a towel or rag to ensure that the seal adheres properly.
Overall, replacing the garage door seal is a simple and effective way to improve the energy efficiency of your home.
By gathering the right tools and materials and following these simple steps, you can complete the job quickly and easily.
Preparing Your Garage Door for Seal Replacement
Garage doors are an essential part of any home, providing security and protection for your vehicles and other belongings.
However, over time, the seals on the garage door can wear out, allowing drafts, water, and pests to enter your garage.
Fortunately, replacing the seal on your garage door is a relatively simple process that can be done with a few basic tools and materials.
Once all necessary tools and materials are gathered, it’s time to prepare the garage door for seal replacement.
This process involves cleaning the door and track, removing the old seal, and inspecting the door for damage.
Step One: Cleaning the Garage Door and Track
Before beginning any work on your garage door, it’s important to ensure that the area is clean and free of debris.
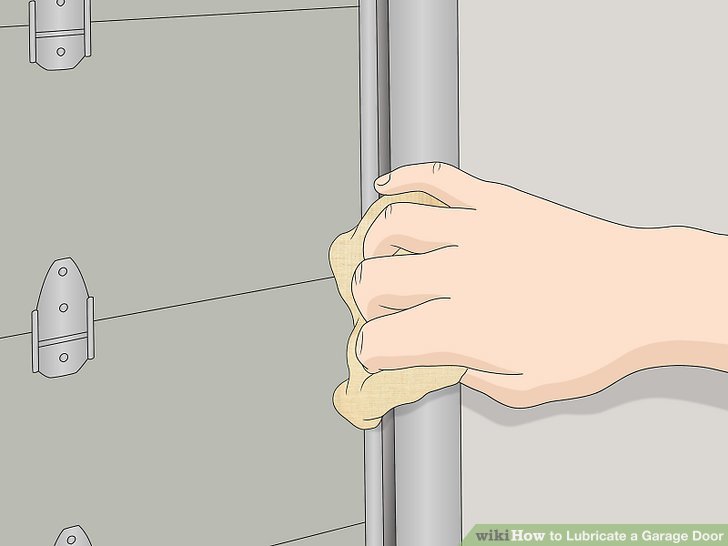
Begin by thoroughly cleaning the door and track. Use soap and water or a household cleaner to remove any dirt, debris, or grease that may interfere with the installation or function of the new seal.
Pay special attention to the bottom of the door, where dirt and debris tend to accumulate.
Once the door and track are clean, dry them with a towel or rag.
This will ensure that the new seal adheres properly and prevents any moisture from getting trapped between the seal and the door.

Step Two: Removing the Old Seal
With the door and track cleaned, it’s time to remove the old seal. This can be done by carefully pulling the seal out of the channel.
In some cases, a flathead screwdriver may be needed to pry the seal loose. Take care not to damage the channel or the door as you remove the seal.
Once the old seal is removed, inspect the channel and door for any remaining residue or pieces of the old seal.
These should be removed before installing the new seal to ensure a proper fit.

Step Three: Inspecting the Door for Damage
Before installing the new seal, it’s important to inspect the door for any signs of damage or wear and tear.
Check for dents, cracks, or other damage that may affect the function of the door or the seal.
If any damage is detected, it’s important to have it fixed before proceeding with the seal replacement to ensure proper function of the door and seal.
By following these simple steps, you can prepare your garage door for seal replacement and ensure that it provides the protection and security that your home and belongings deserve.
Installing the New Garage Door Seal
Is your garage door seal worn out and letting in unwanted air, water, and critters?
Don’t worry, replacing the seal is a relatively easy task that can be done in just a few steps.
With the door prepped and the new seal in hand, it’s time to install the seal.
This process includes aligning the new seal, securing it in place, and adjusting the garage door as needed.
Step Four: Aligning the New Seal
Before you begin, make sure you have the right seal for your garage door.
Seals come in different shapes and sizes, so double-check the measurements and type of seal you need.
Begin by aligning the new seal with the channel on the bottom of the garage door. This channel is where the old seal was likely installed.
Ensure that the seal is centered and extends to the edges of the door for maximum effectiveness.
A properly aligned seal will create a tight seal and prevent any unwanted air or water from entering your garage.
Step Five: Securing the Seal in Place
Once you have the new seal aligned, it’s time to secure it in place.
Use a tapping block or rubber mallet to gently tap it into the channel, ensuring a tight and secure fit.
Be sure not to tap too hard as this can damage the seal.
If your garage door has a metal track on the bottom, you can use pliers to crimp the track over the seal to hold it in place.
This will also help prevent the seal from shifting or moving out of place.

Step Six: Adjusting the Garage Door as Needed
After the new seal is installed, it’s important to test the garage door’s function. Open and close the door a few times to ensure it is operating smoothly.
If the door does not open or close properly, it may be necessary to adjust the balance to ensure it operates smoothly.
This can be done using the adjustment screws located on the garage door opener or on the door itself.
If you’re not comfortable making these adjustments yourself, it’s best to call a professional in Brandon FL.
With a properly sealed garage door, homeowners can enjoy the benefits of a functional and secure garage.
Not only will a new seal keep out unwanted air, water, and critters, but it can also help improve the energy efficiency of your home.
Replacing the garage door seal is a simple and cost-effective way to maintain the integrity of the garage and prevent costly repairs down the road.


